Showing posts with label How I painted Joanna. Show all posts

How I Painted Joanna's Portrait


This is the finished portrait of Joanna. 20" x 24" Oil on Linen.

When painting in layers, it is important to understand that each layer is painted to facilitate the following layer - NOT to correct mistakes.

Start with a plan and draw it out in detail before you ever pick up a brush.


Of course I began with a raw umber toned imprimatura. See this.

When the imprimatura was dry I transferred the drawing to the canvas, used a black Sharpie marker for my guide lines and began to "draw" using raw umber and Liquin. I like to use a soft brush.


This is a close up detail of the beginning of the drawing process. You can see my drawing (cartoon) under the paint.


This is the finished raw umber drawing. It can be done in one day, but sometimes I take more time. Even though it gets dark, the Raw Umber is a warm amber and transparent.

Be sure to let this dry.


This is my first layer of white in building the "dead" underlayer. To begin, I scumble a mixture of Titanium White and Liquin onto the dry surface.


Then I slowly begin to build up white as you can see in this detail. Except for some areas of the sky, I'll stick pretty much to the figure.

Note that light is applied thickly. Shadows are thin and transparent.


This is day two and I'm still building light.


This is a detail of how the light is built and as far as I wish to go on the figure and objects in the foreground.


I'm starting to glaze color into the background and put in the first skin tone glazes.

You can see the rest of my process here:


Manipulating the Original Reference Photos


Here's the finished portrait...


Portrait of Joanna
20" x 24" Oil on Linen

You might notice that I did not get a likeness above  (to the photo below) but I did get a likeness to the sitter, Joanna. There's a story here - read on.


This is the original reference photo I used. I took this photo in my studio without attempting to block any natural (indirect) daylight coming in the windows.

I used a Nikon D2X digital camera on a tripod and a Nikon Speedlight bounced into a white umbrella as my single light source.


This is a closeup of Lola the Pet Rat. When something in a photo doesn't "explain itself" - either force it to make sense - or just don't paint it.

There are "too many fingers" in this shot. I eliminated the unnecessary "extras."

I did not paint Lola's tail - it didn't make any sense in the photo and she looks OK in the painting without it.


You can see the "extra fingertips" eliminated in the final (detail) above. I think it makes more sense now.

Also, you can see that I turned the Antique snake bracelet around so it would "explain itself" and look like what it was in the final painting.


Also in the original reference photo, I did not like the skirt. It didn't drape nicely and wasn't interesting enough to paint.

So I took a white bed sheet and rearranged it with a similar light source. Then I photographed and "drew" it into the painting.

Now here's a glitch (and what portrait isn't without glitches?). In the final painting I had the "likeness" ....from the photo. But the photo "fibbed."

Joanna's face in my original reference photo looked uncharacteristically "fat." (I did not know this when I began the portrait.)


I had to "tweak the painting" until it finally looked more like the real person, Joanna, than the photo did. I used a combination of removing highlights and rearranging hair. I couldn't rearrange the anatomy (move ear,  jawline, etc.) - that would invite disaster bigtime.

Aaaaaaargh! Too bad we didn't see that in the beginning - groan - we could have easily chosen another photo to work with. 

Planning Joanna's Portrait


This is the finished portrait of Joanna.
20" x 24" Oil on canvas


It was a verrrrry complicated project. 

I was asked to include the following items in this portrait and wondered how on earth I was going to design this portrait to hold it all and not detract from the sitter, Joanna.

Here's what's in the portrait (besides Joanna):

A particular wooded scene
Figure sitting under a tree
Fall leaves
Foliage including herbs
Three special blue rocks
Deer antlers
Granite boulders
Gazelle
Blue jay
Wild boar
Lotus flower
Newt
Water (drops)
Wand
Trident
Snake
A circle within a triangle within a circle (symbol)
Luna moth
Sea turtle
Antique bracelet 
Antique ring
Feathers
And an adorable little pet rat named Lola


Sketch #1

I took a reference photo, printed it out on my inkjet printer and taped it to a piece of scrap cardboard.

Then I painted on top of it (using oil paint) to determine the overall color and composition. If I'm going to show this to somebody, I am a bit more careful to make it look "good."


Sketch #2

I liked the background colors in this sketch.

I liked the two poses above but the client did not like the face so I did another photo shoot in my studio.

The picture above is complicated enough that I could sneak a lot of unrelated elements into it.


Sketch #3

This pix was from the second photo shoot. The pose was too contrived and it ultimately cut down on my background options.


Sketch #4

This is the figure I used but I didn't like the skirt so I changed it in another shoot. I lightened the foreground and added foliage to break up the form.

Basically none of these sketches worked out as is but it helped to clarify my thinking and gave the client some idea where I was going with this painting.

For the background, I used a combination of Sketches 1, 2 and 4 above. Sketch 3 shows how narrow the face is and it "looks more" like the sitter. Unfortunately I did not notice this in the original reference photo we chose. Drat.


Painting Skin Tones - One Layer at a Time


There's a Zen to painting in layers. 

You have got to enjoy the process or this isn't the method for you....(but don't worry, there are lots of ways to paint a portrait & get a similar result). Personally I like any way that is easy. And this is pretty easy - but alas, it isn't fast 'cause you just have to wait for those layers to dry before moving on.

"It is good to have an end to journey toward, but it is the journey that matters, in the end."
-Ursula K. LeGuin


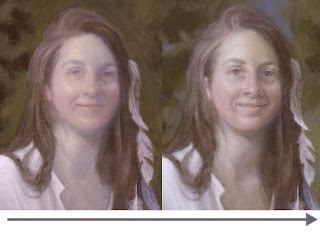
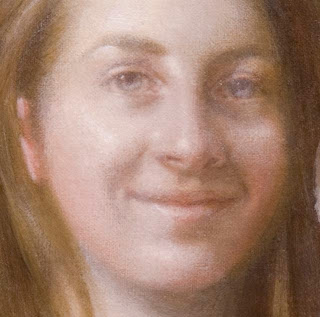
On the left side is a picture of the last completed layer (uncorrected). 

On the right is the current layer (uncorrected). 

That short journey from left to right is the subject of this little mini- demo on how to paint a layer on a face. (Of course, the same process works for hands, feet, all skin showing).

I use this method (multiple layers) to build light and form in small increments in order to get the luminosity of the Old Masters.

The more layers I paint - the more luminous it gets.

This example is only one of the many "middle layers" and merely illustrates a small (and relatively easy) step that goes into painting a portrait.

This particular face is small, only 3.25 inches high and this entire layer (shown) here only takes me half an hour (more or less). It is a lot easier and faster than it looks - really!

The hard part is waiting for my paint to dry so I can begin to build the next layer. 

While I wait, however, I work on background, clothing, props, other paintings, this blog, run errands, eat lunch...you get the idea.


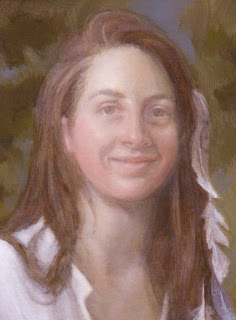
This is the corrected face from the last demo on losing/finding a likeness. It is now ready for yet another layer.


I begin by reinforcing the lights (Titanium White) and the darks (Raw Umber thinned with Liquin) to increase the contrast. I try to avoid hard edges in this.

I let this dry thoroughly (i.e., overnight).


This is the palette I use in a layer. It does not matter if the skin tone is light or dark...the colors are the same but obviously the values will be different.


I mix/match the approximate skin tone (raw umber, burnt umber, raw sienna, titanium white), mix it with Liquin and scumble it over the entire face. 

Note that my paint is never so thick that I cannot see through it to the layer below.

See why I reinforced the darks & lights to bump up the contrast?


Into the wet surface, I add color. See my demo on Old Master Color Banding in Portraiture for particulars.


I blend those colors in.


This is how I mix "The Universal Color of Light."


I use this "Universal Color of Light" to build light on the face (or just about anywhere).

If the light looks chalky, I add more yellow.

If the light looks too yellow, I add more white.


I continue pulling the light down into the face. I am only working with light - not color.


I continue adding light. I locate and reinforce the centers of light with thicker paint.


I add more light, work it in and let the light build and define the form.


I continue to define the form with light.


I add even more light into the centers of light (as defined by the highlights).


I work this light in and build form. I allow the light to go into the hair.

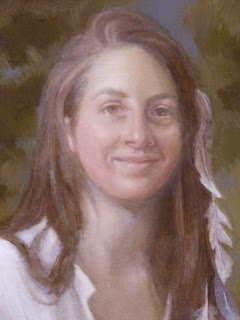
This layer is done and it must be allowed to dry thoroughly.


I did correct the above pix, then went on and painted the next layer below.


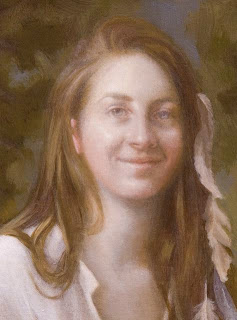
ABOVE: Here is a peek at the next layer (uncorrected as to likeness, without a skin tone glaze and ill-defined features). The light is now so thick you cannot see the weave of the canvas through it. I've started to work on the hair. I wish this photo wasn't so small - it is really quite a jump forward.


This is a detail. You can see the color locked underneath as I build light on this face. 

Next:
I'll correct the likeness and define the features with raw umber and let it dry.
Next I'll glaze this back into a skin tone and let it dry.
Then I'll match a scumble to the skin tone and work color (bands) into the face
I'll let this dry - and repeat the process if necessary.

Considering how "unfinished" this stage looks right now, it is relatively quick and easy to transform a face with several layers of light into a finished face.


This is a detail showing how the light flows over the face with what is underneath still being visible. Do NOT paint around features like eyes, eyebrows - and don't be afraid to paint over the entire face in order to define the light. It is the paint that shows through that gives a painting its subtle beauty of form.

NOTE: I usually do the face LAST as the skin tones are really determined by what surrounds it (i.e., the background). So I'm going to stop working on the face now and bring the rest of this painting into being before I get all the color into this face.

I just keep repeating this entire layering process until the face tells me when it is time to stop and finish.

"Everything the same; everything distinct."
- Zen Proverb