Vanessa wrote and asked me some questions about the lighting equipment I use for making photographic reference material for a painting. (Her Q's in grey and her original post here).
I thought that a public answer was a good way to clarify and expand some more information with all of you.
Vanessa: I need one light source strong enough for head and shoulder that can also softly fade down a full-length dress should I need it to.

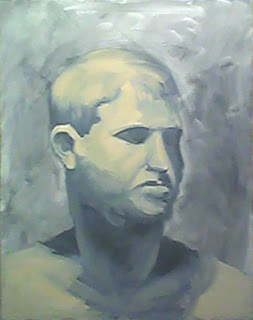
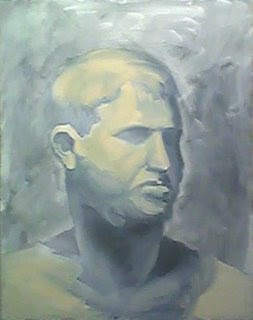
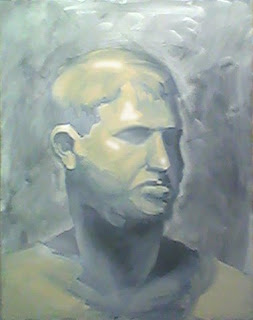
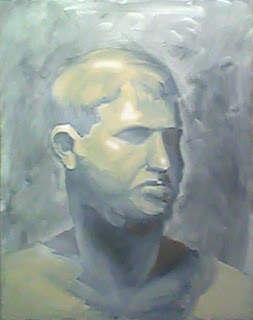
Yes, I think that a single source of light the best way to photograph a subject for a reference as in the photos above and below. Whether it is a full figure or just a head, the light needs to flow from top to bottom.

Vanessa: I have been looking at a cool florescent daylight and stand with 4 150, or 250watt bulbs - it has a 44 x44 inch soft box.

Some of these light can be off or on. Britek Pro 5000 produce these and sell them on www.lincoinc168.com (as in above photo).
I have a soft box and the lighting is good. However I quit using it because it doesn’t work well when I photograph children who seldom sit still (or adults who fidget).

Right now I’m shooting with a Nikon Speed light which acts like a strobe in that it freezes action, allows for a lower ASA/ISO (film speed) and a sharp focus.

I prefer a Nikon wireless speedlight commander SU-800 (above) which clicks into my camera and automatically controls the speedlight's flash unit.
I shoot into or through a white umbrella which diffuses the light.

For a small subject – like my Day Lily Still Life above – I sometimes use a hardware store clip-on light holder with a florescent bulb. This makes it easier to adjust, see and compose shadows as important design elements.
Really fancy complicated equipment can be overkill. My best advice is get clear about what in particular you really need and go for the easiest and cheapest way to make that happen.
Vanessa: Firstly, do you like florescent for portrait photos?
Yes, fluorescent light is more diffused and thus creates a softer shadow.
I find that my digital camera makes adjusting color a lot less fussy than it was when I was using my old film camera.
Note: I paint using overhead color-balanced fluorescent lighting so my hand does not cast a shadow on my painting surface.
Vanessa: Secondly, in your use of florescent would this light source be powerful enough - as it is not a strobe – what you see is what you get.
Yes, I have used florescent lighting for a figure - but the person must sit still. I was getting way too many blurry shots. But on the other hand, it is easier to see and setup compositional shadow elements when the light source is steady.
But because I now use a speedlight, I make a few test shots in order to properly position my light. When I shoot in my studio, I have a general idea of where the light work best as I have done it so many times.

On location shooting, I often test the lighting with a model before the scheduled shoot. As in the above photo, you can see that there are many ways to light a subject and all of them are probably "correct."
However, as a rule of thumb, it is probably a good idea to have the light positioned on the upper left side of the model - it usually works best there and is a good starting point.
Walk around a museum. Look at the lighting the Old Masters used. You can learn a lot from that.
Also, please note that I use a neutral background drape to shoot my subjects.
When I need a specific background, I shoot that separately and paint it in behind the subject. Getting the background and the foreground “right” is too difficult for one shot - at least for me.

I photographed the model above in my studio using my speedlight. I took many photos of the background separately and combined some of the elements in order to portray the "character and feeling" of the location.
Vanessa: Thirdly, I would think it would be easier to concentrate on composition, expression, if one is not messing with lighting connections and strobe. Would you agree?
Yes definitely. Once you figure out how to use your equipment, you can easily set it up and use it without much of a fuss. But of course there is a learning curve with all new equipment.
Vanessa: Would you advice that at 30 lbs it might be too heavy for taking on location?
Basically I'm lazy. I like my equipment to be small and lightweight (think airline travel nowadays). My Speedlight and Commander are small enough to fit in my camera case.

My light stand (model above) folds up along with the small size umbrella and will easily fit into my suitcase.
If I need to bounce light into a shadow area I can use any white object like a piece of paper, poster board, white sheet, etc.
Because I shoot in ambient light (as opposed to a darkened room) I usually don’t need to do this and my speedlight will give me the compositional shadows I need.
I just remember to take a few test shots, download them to a computer and take a peek to see what is happening with my shadows.
Vanessa: Still lapping up your teaching and loving it.
Thanks, I hope it all helps.
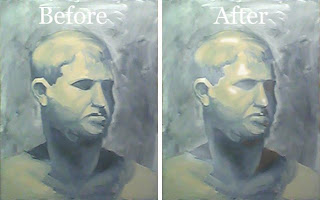
The following pictures are examples of lighting that I like. I include them because it is easy to see the simplicity of it all on a monotone statue.
Don't forget that interesting clothing makes for an interesting painting.

I always try to aim the strongest light on the forehead and let it gently wash down the figure.

With a film camera I had trouble shooting a full figure because I needed to back up away from the model in order to lessen the lens distortion.
With my digital camera I can stand much closer to the model and don't need as large a space to shoot in.

Remember, in general,your light ought to be placed so that it falls strongly on the forehead of the subject being photographed.

You can see that Rubens painted the strongest thickest light on his daughter Clara's forehead.