
Last year I went looking for a winter landscape to paint. This is what I saw near my house:

The scene had some potential: interesting design elements and the required colors for a good painting: red, yellow, blue, black and white....so what could go wrong? Ha!
And of course, this is what my camera recorded - it could have won "The Blah Award" (and I have more than a few of these).

So I fixed it in Photoshop to make it into a more useful photo reference and this is how I did it:

Select: Image - Adjustmets - Levels.

In Levels, grab the right hand triangle and slide it to the left so it just touches the black line on the far right side of the curve.
Then grab the middle triangle and move it slightly to the left until it "looks okay."
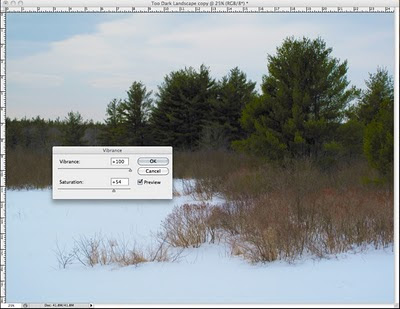
In Adobe Photoshop CS4 I do this above:
Image - Adjustments - Vibrance (increase)

With earlier versions of Photoshop, you can do this:
Image - Adjustments - Hue/Saturation (increase saturation as shown above)

In the same way, Photoshop works for problem portraits too:
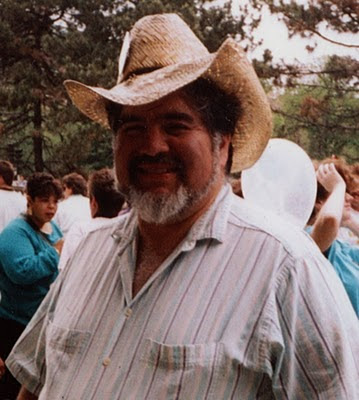
This is my old friend, Artist John Garcia. He died and all we have is a crummy snapshot that doesn't do hm justice (above).
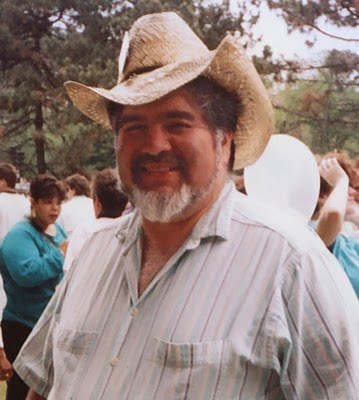
With the help of Photoshop, however, his family and friends can better enjoy this picture of John's warm smile and friendly face.
Moral:
"Never give up on a bad photo. . . sooner or later, technology will catch up."


No comments:
Post a Comment